How to Use Reawote Assets in Revit
Use Reawote textures in native Revit materials, from Appearance maps and bump detail to real-world scale and reusable material libraries.

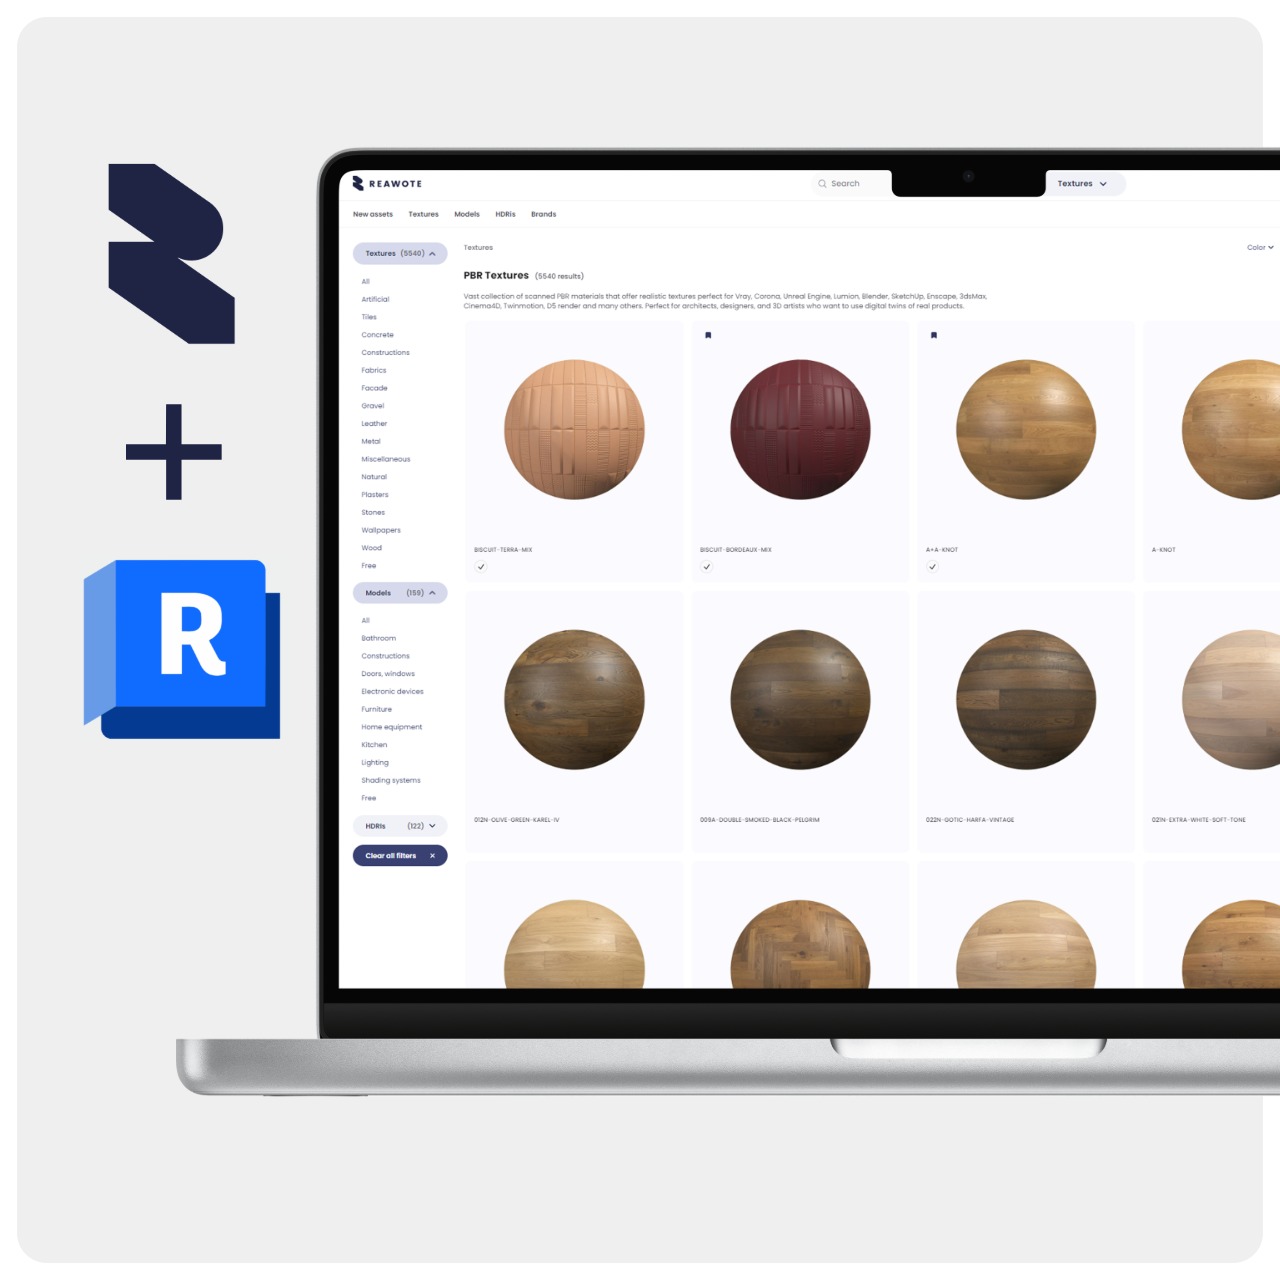
How to Use Reawote Assets in Revit
Revit is different from D5 Render, Twinmotion or Lumion. It is a BIM application first, so its native material system is built around Appearance assets, not a full renderer-style set of PBR slots.
That does not mean Reawote materials are unusable in Revit. It means you should bring in the maps Revit can use natively, keep the real-world scale correct and avoid forcing unsupported channels into the material.
This guide focuses on native Revit materials — not Enscape, V-Ray or another renderer running inside Revit.
In short
- Build the material through Material Browser → Appearance, preferably by duplicating a similar material and its assets before editing.
- Revit does not expose a one-to-one D5-style slot for every Reawote PBR map. Use only the inputs supported by the selected Appearance asset.
- Reawote exports OpenGL Normal maps. In Revit, load the Normal texture through Relief Pattern (Bump), then set Texture Editor → Advanced → Data Type to Normal Map.
Download the right Reawote maps
Start by checking what the Reawote material contains and what the selected Revit Appearance asset can actually use.
A Reawote PBR material is a set of maps describing different surface properties. Native Revit will normally use only part of that set.
- Open the PBR asset in the Reawote library.
- Check its Resolution, Texture dimensions and Included maps.
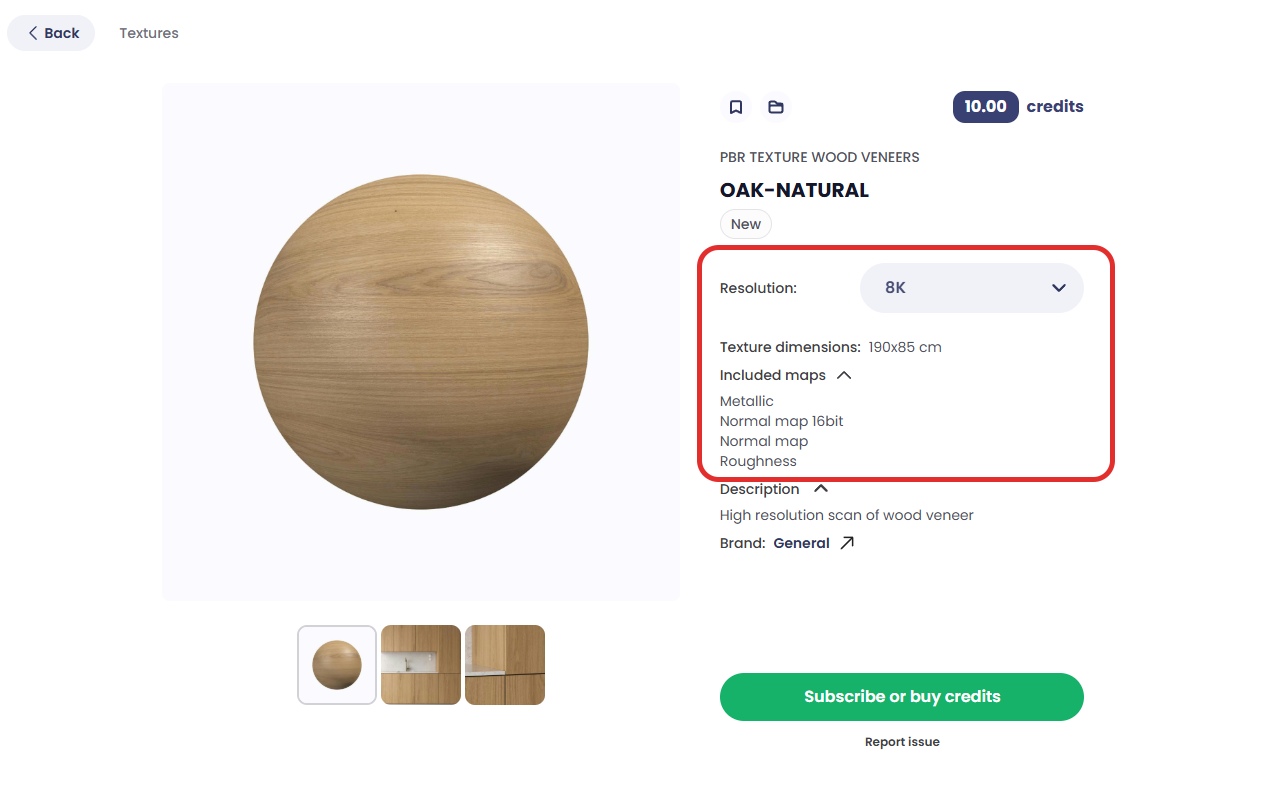
- Download the PBR material package.
- Prepare only the maps that fit the Revit material you are building:
- Color / Albedo → Appearance → Color image
- Roughness → Roughness image on compatible physically based Appearance assets
- Normal → Relief Pattern (Bump) → Texture Editor → Advanced → Data Type: Normal Map
- Metallic → use an appropriate Metal Appearance asset; native Revit does not provide a universal metalness-map workflow
- Ambient Occlusion → no dedicated AO input
- Displacement / Height → Relief Pattern (Bump) → Data Type: Height Map
- Opacity → Cutout for hard black-and-white masks; use a transparent or glazing Appearance asset for physically transparent materials
Revit's native material workflow is not designed to reproduce every advanced PBR channel. That is normal. The goal is to use the data the Appearance asset supports correctly.
Create the Revit material and connect the maps
Autodesk recommends starting from a similar existing material rather than building every material from zero.
- Go to Manage → Settings → Materials.
- Select a material that is close to the surface you want to create.
- Duplicate it using Duplicate Material and Assets so your edits do not change another material that shares the same Appearance asset.
- Open the Appearance tab.
- If the material uses a legacy Appearance asset, replace it with a current physically based asset where appropriate.
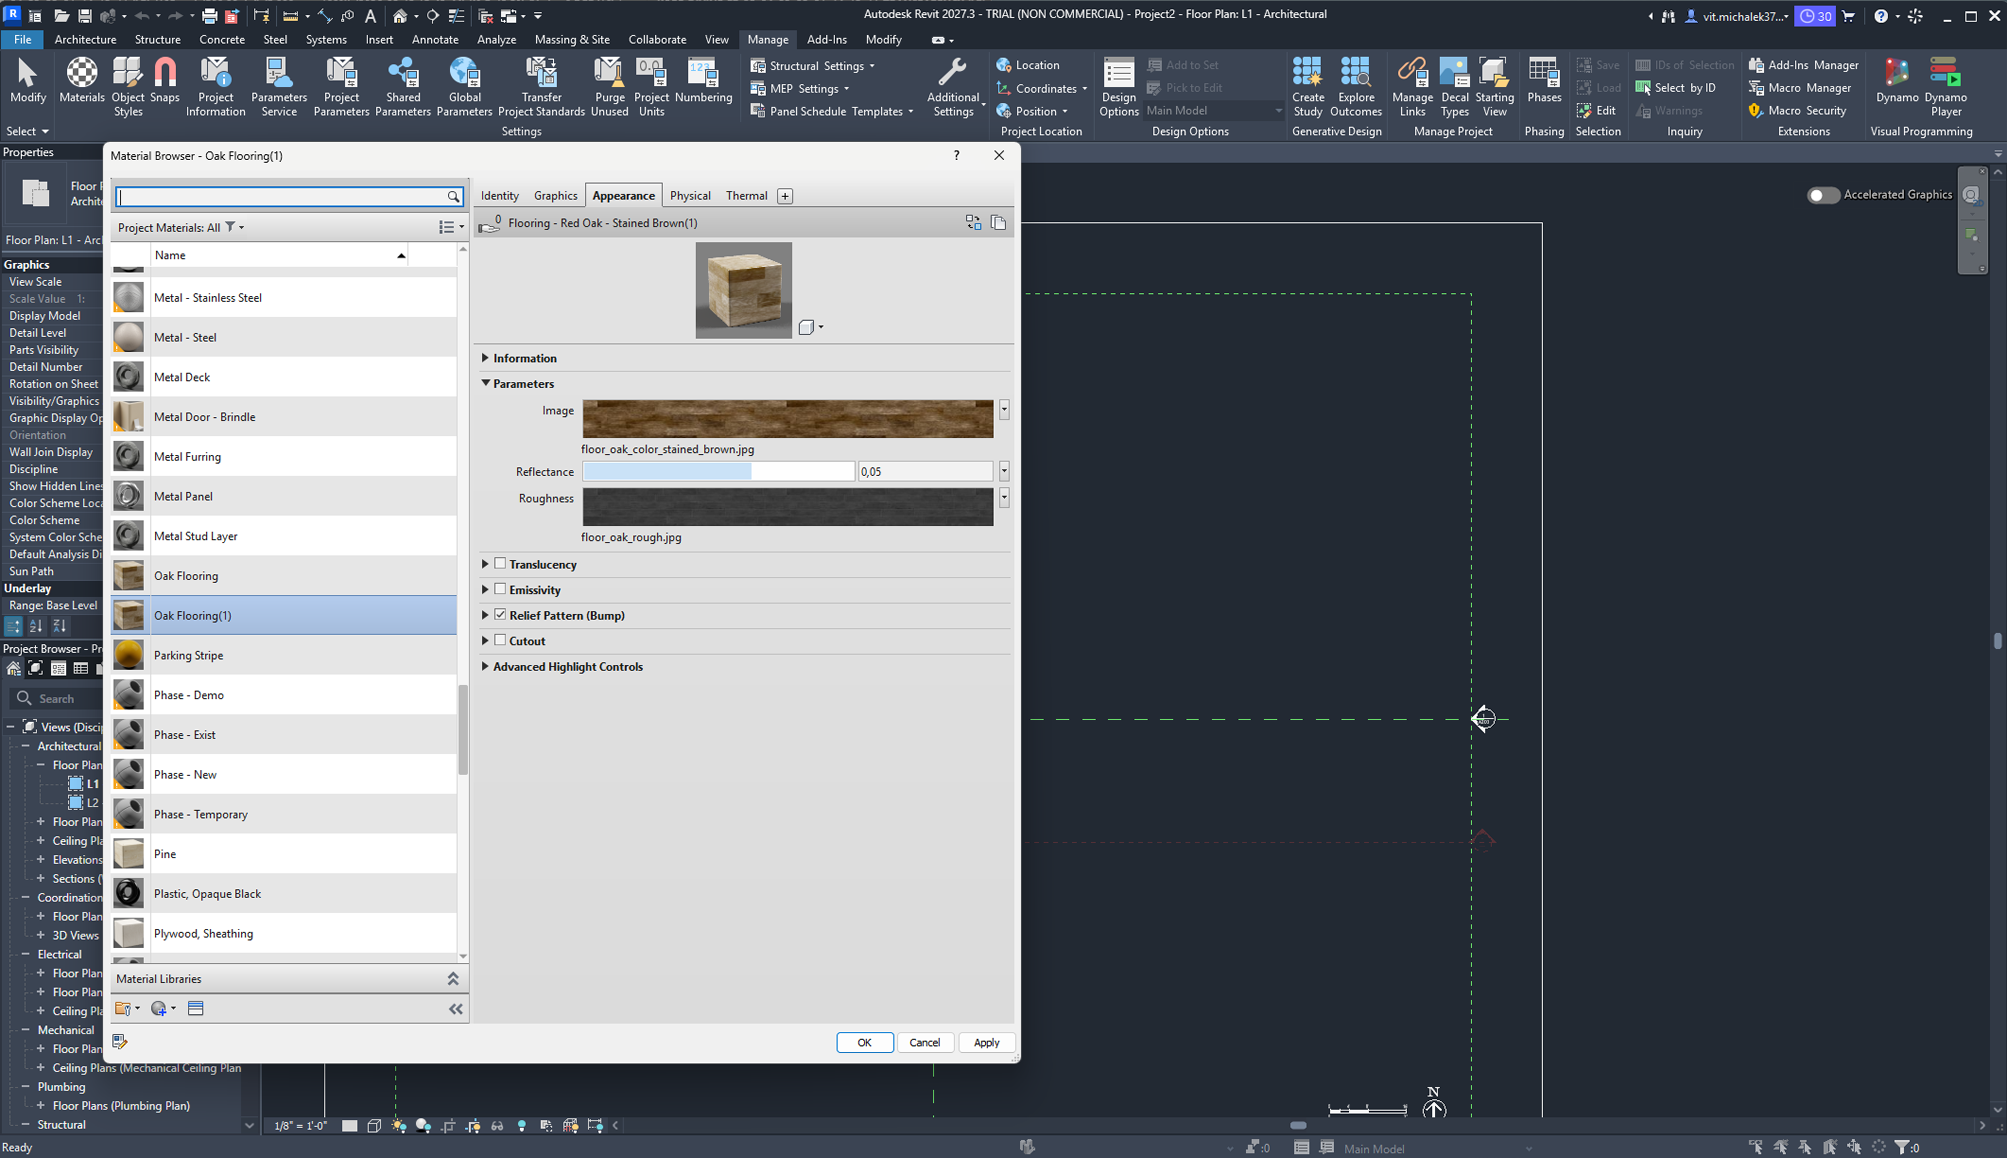
Base Color and Roughness
Load the Reawote Color / Albedo map into the Appearance asset's Color image input.
On compatible physically based Appearance assets, load the Reawote Roughness map into the Roughness image input. If the selected Appearance asset does not expose Roughness as an image input, do not force the map into another property — use the controls provided by that asset instead.
Normal and surface relief
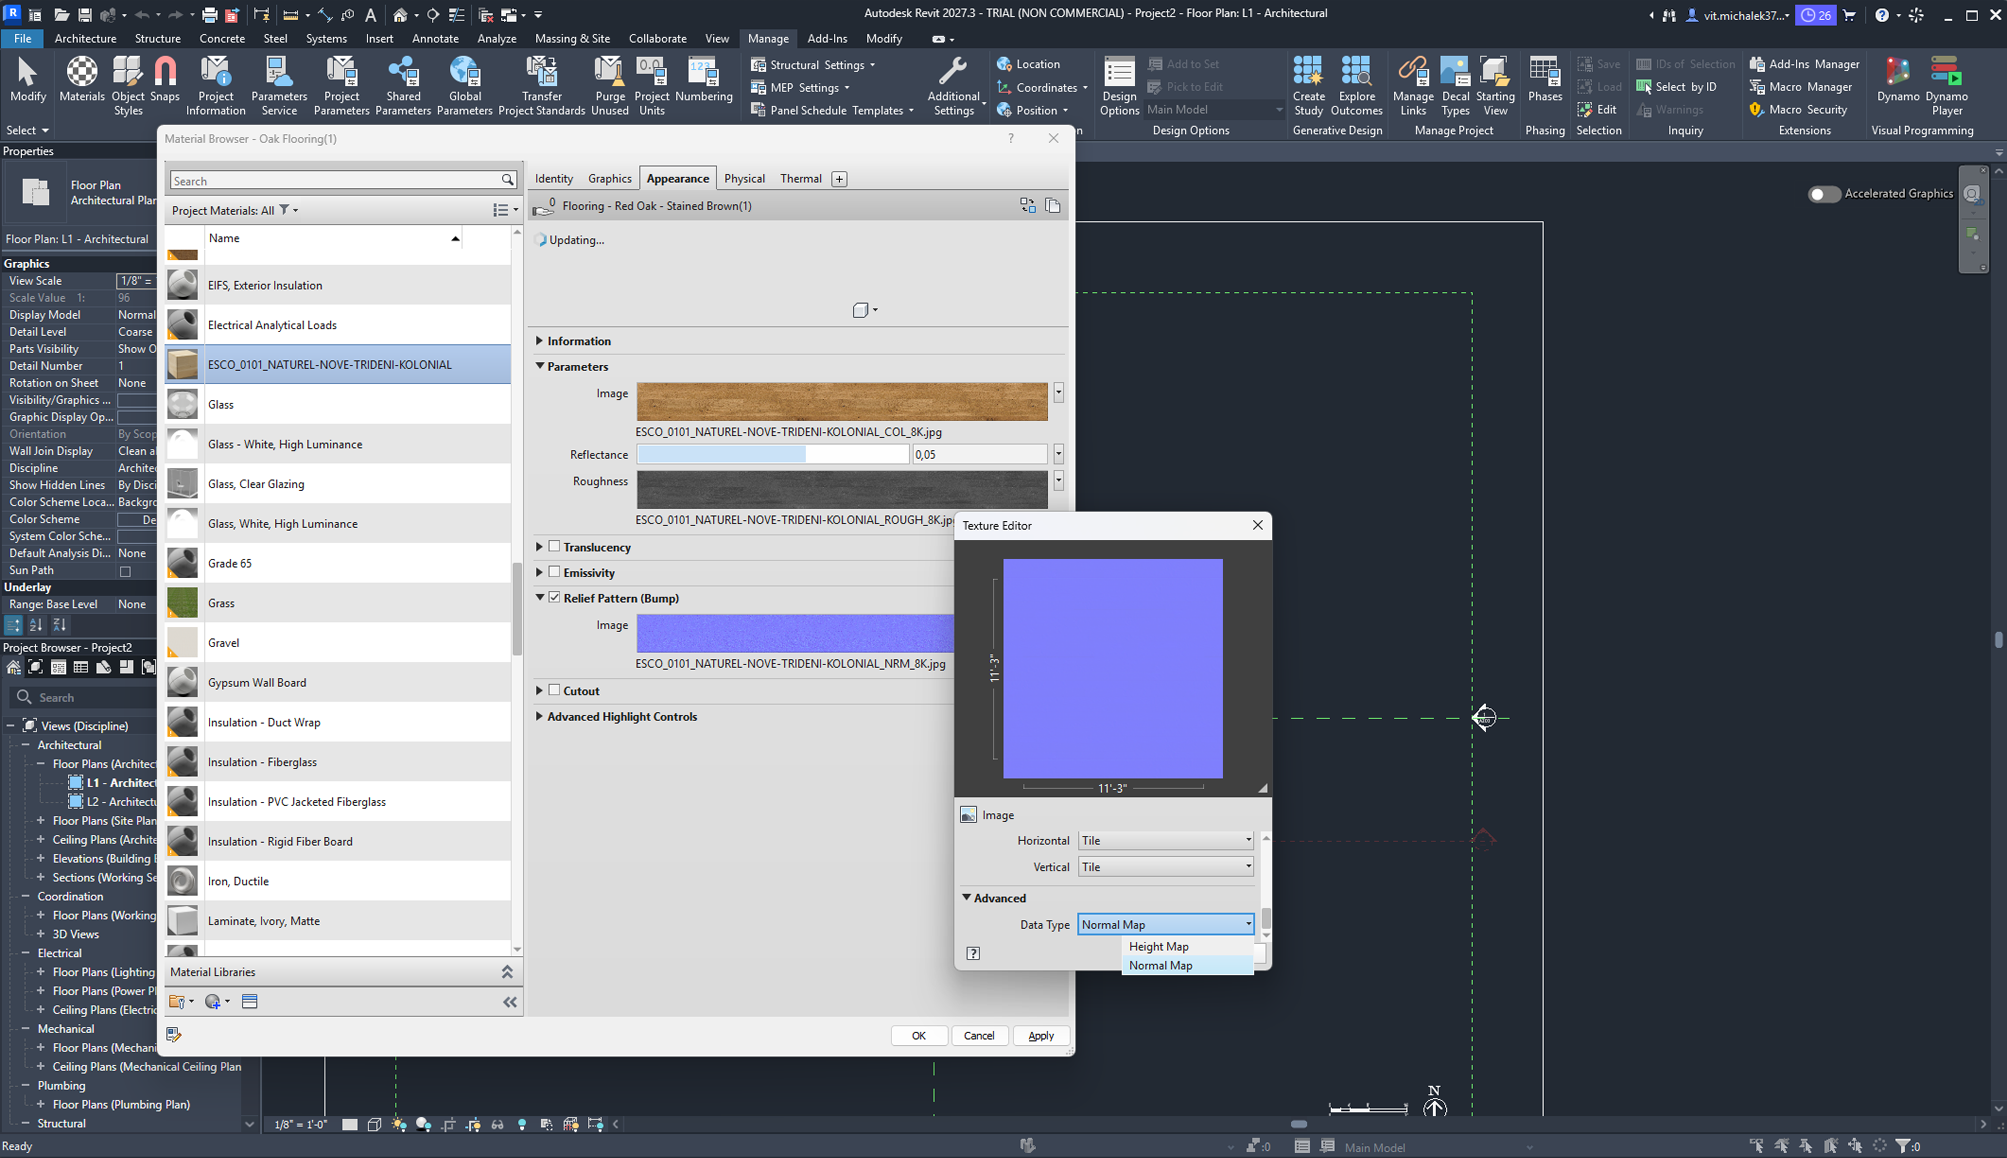
Revit handles Normal and Height maps through Relief Pattern (Bump).
For a Reawote Normal map:
- Load the Normal texture into Relief Pattern (Bump).
- Open the Texture Editor.
- Expand Advanced.
- Set Data Type to Normal Map.
For broader grayscale relief, load the Reawote Displacement / Height map into the same Relief Pattern (Bump) input and leave Data Type set to Height Map. Revit uses this to change the way the surface shades; it is not true geometric displacement.
In a Height map, brighter areas represent peaks and darker areas represent valleys.
Metallic, AO and Opacity
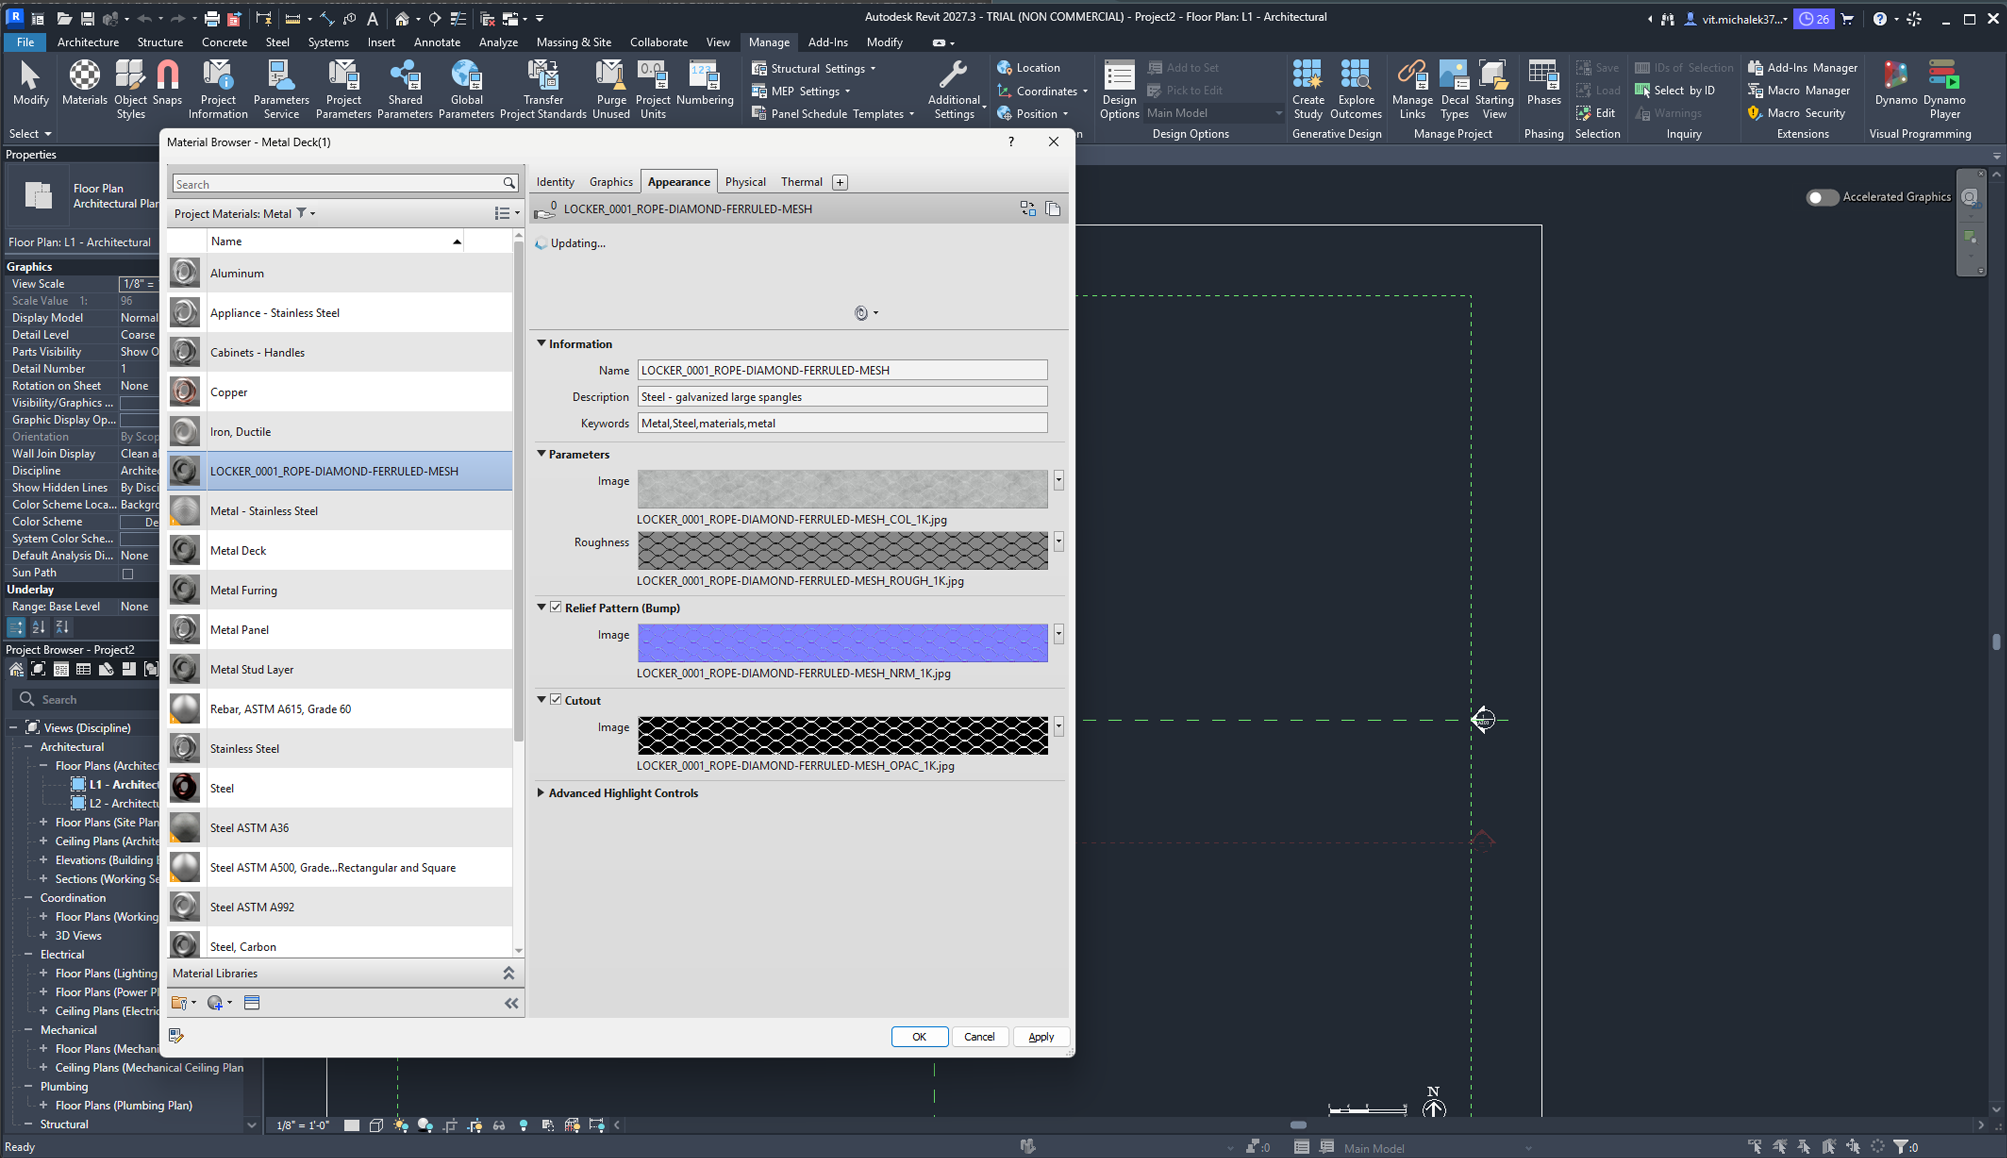
Native Revit does not use a general metalness texture map the way Lumion or D5 does. For a metallic product, start from an appropriate modern Metal Appearance asset and tune the properties that asset provides.
There is no dedicated AO texture input in the standard Appearance workflow.
For perforated or cutout surfaces, use the Reawote Opacity map as a Cutout image where the selected Appearance asset supports it. Cutout is intended for hard masks: black areas become openings, so use a clean black-and-white mask rather than a grayscale transparency texture.
For glass or materials with continuous transparency, use an Appearance asset designed for transparent or glazing materials instead of Cutout.
Get the Normal map direction right
Reawote exports Normal maps in OpenGL format, which can be used directly in Revit without converting the green channel.
- Load the Reawote Normal map into Relief Pattern (Bump).
- Open the Texture Editor.
- Expand Advanced.
- Set Data Type to Normal Map.
Revit will then interpret the texture as a tangent-space Normal map rather than a grayscale Height map.
Match the material to its real-world scale
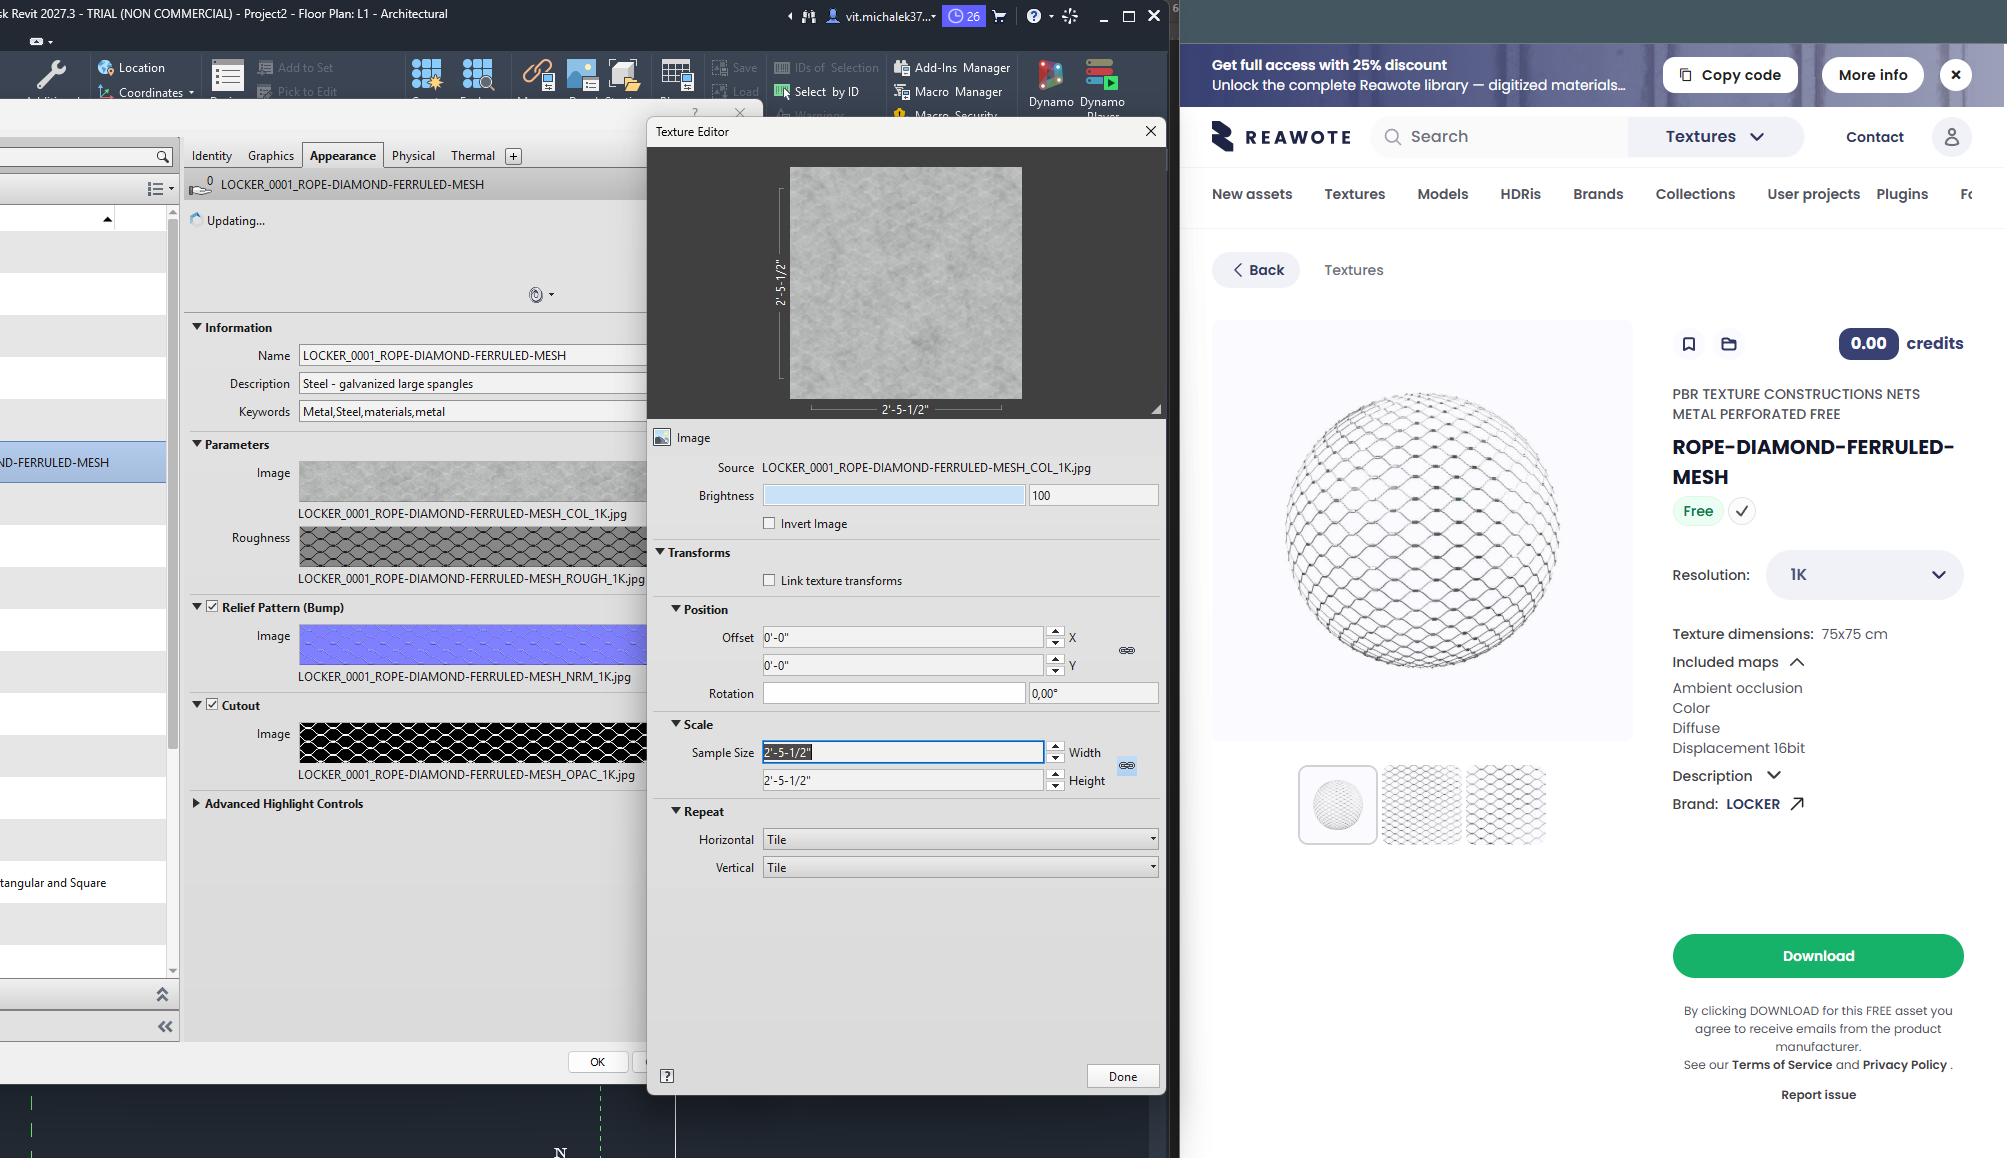
Reawote lists the real Texture dimensions for each material, and Revit's Texture Editor lets you define the physical size represented by an image.
- Open the Reawote asset page and check Texture dimensions.
- In Revit, open the image in the material's Texture Editor.
- Set Sample Size to match the real dimensions of the Reawote texture.
- Use the same size for the other mapped images so the material channels stay aligned.
Fix the most common material problems
Most issues come down to a few simple checks:
- Texture is not visible in the model — make sure the material is assigned correctly and view it in a mode that displays the Appearance asset, such as Realistic.
- Material looks too glossy — check the Roughness or finish controls provided by the selected Appearance asset and make sure Glossiness has not been treated as Roughness.
- Surface detail looks inverted — check that Data Type is set to Normal Map, then verify the Reawote OpenGL map on a groove or recessed joint.
- Pattern looks too large or too small — match Sample Size to the Texture dimensions shown in Reawote.
- Editing one material changes another — the materials are sharing an Appearance asset; use Duplicate Material and Assets before making independent changes.
Save the finished material for reuse
For repeated use across Revit projects, save the finished material in a custom material library.
- Open Manage → Settings → Materials.
- In the lower-left Material Browser menu, choose Create New Library.
- Save the library as an .adsklib file.
- Drag the finished material from the project materials list into the new library.
- Open that library in future projects and copy the material into the project when needed.
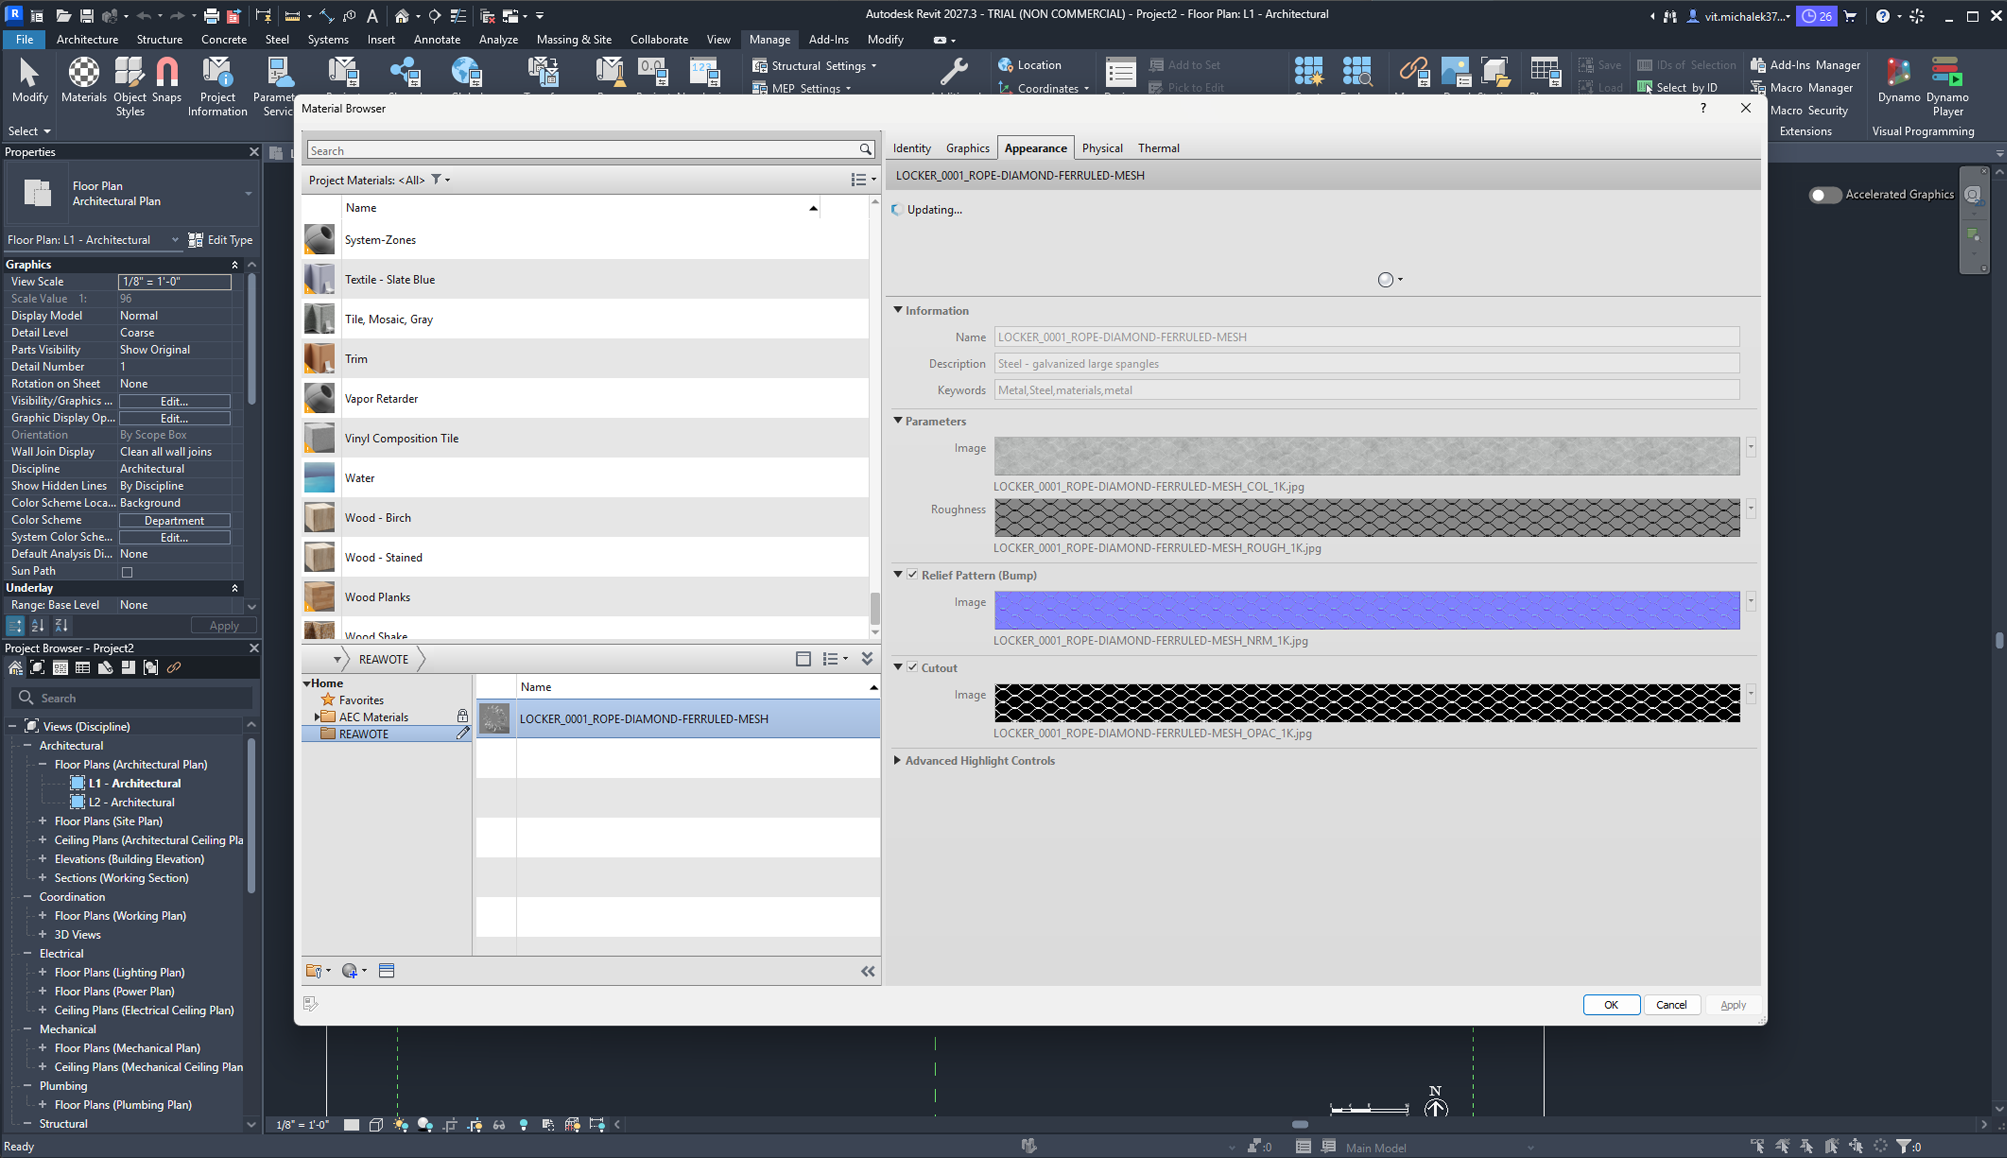
Revit will not use every map in a full Reawote PBR set, and it does not need to. Use the Appearance data Revit supports, keep the physical scale correct and preserve the full Reawote package for downstream rendering tools.
The BIM model stays practical. The material stays connected to the real product.
Related posts
Join our community and stay updated on all things 3D
Sign up to our newsletter.


Build a better world with real-world 3D detail
Step into the digital world and explore new ways to create, present, and distribute products — without limits or physical constraints.