How to Use Reawote Assets in D5 Render
Set up Reawote PBR materials correctly in D5 Render, from map assignment and normals to displacement and real-world texture scale.

How to Use Reawote Assets in D5 Render
A good PBR material should not need hours of tweaking before it starts looking believable. In most cases, problems come from something much simpler: the wrong map in the wrong slot, an inverted Normal map, displacement that is too strong, or a texture scaled differently from the real material.
D5 Render already gives you the tools to avoid most of that.
Once the Reawote maps are connected correctly and the material is matched to its real-world dimensions, D5 has the information it needs to reproduce the color, reflections, fine surface detail and physical depth of the original surface.
This guide takes you through the complete workflow.
In short
- D5 Render uses a metallic/roughness PBR workflow, so most Reawote materials will use Color, Roughness, Normal and, where relevant, Metallic, AO, Height and Opacity maps.
- Reawote ships OpenGL Normal maps, but D5 Render uses DirectX. Flip the green channel before importing, or the surface detail will appear reversed.
- Use the Texture dimensions shown in Reawote as your reference for scale. A technically correct material can still look completely wrong when the pattern is twice its real size.
Download the right Reawote maps
Before opening D5 Render, prepare the version of the asset that makes sense for your scene.
A Reawote PBR material is a complete set of information describing the real surface. The individual texture maps inside that set each control a different part of the material.
You normally do not need every available map in every project.
- Open the PBR asset you want to use in the Reawote library.
- Check its Resolution, Texture dimensions and Included maps.
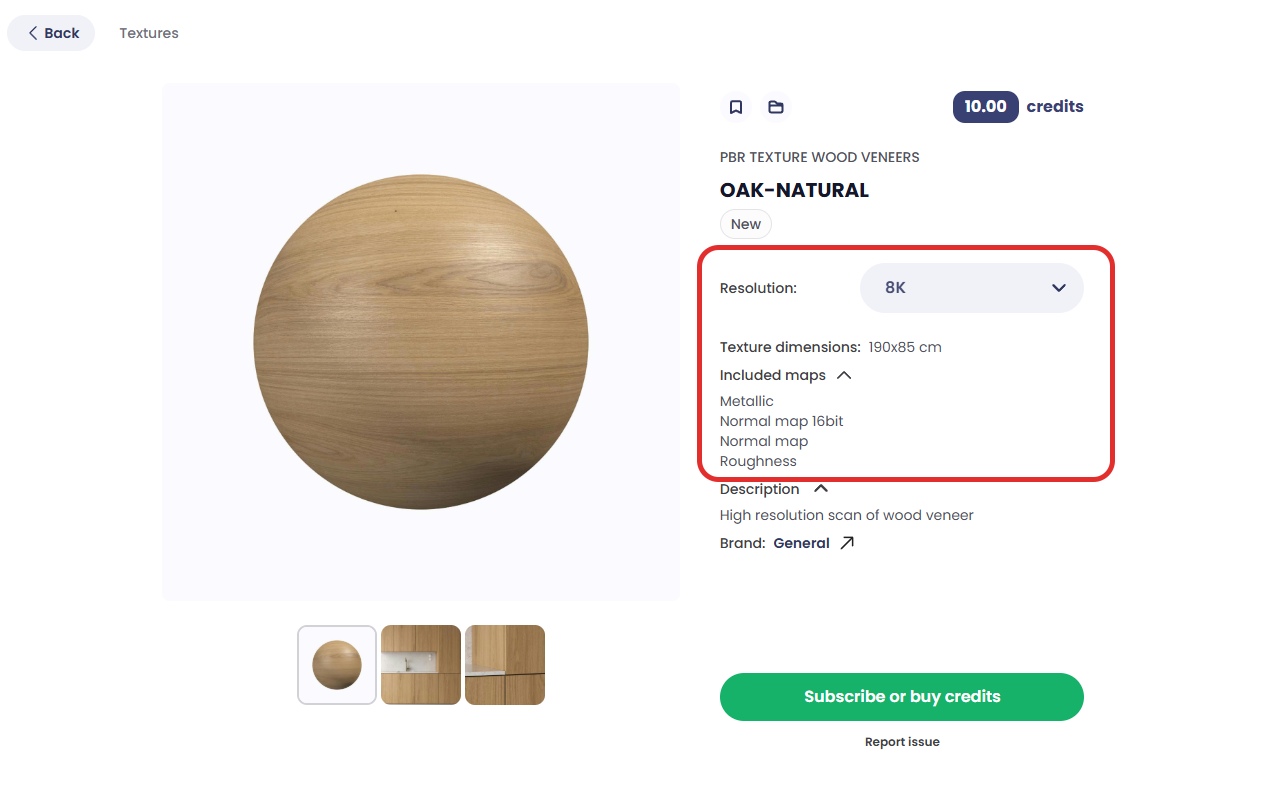
- Choose the resolution that fits the way the surface will appear in your render.
- For most architectural visualization work, 4K is a practical starting point. Use 8K when the material is close to the camera, covers a large visible surface or contains fine detail that needs to hold up in a high-resolution output.
- For distant or secondary surfaces, a lower resolution can save GPU memory without creating a visible difference.
- Download the PBR material package.
- Prepare the maps that are relevant to the material:
- Color / Albedo → Base Color Map
- Roughness → Roughness
- Normal → Normal
- Metallic → Metallic
- Ambient Occlusion → AO
- Displacement / Height → Height
- Opacity → Opacity Map
D5 uses a metallic/roughness workflow. If the Reawote package contains both Roughness and Glossiness, use Roughness directly.
Glossiness describes the same property in the opposite direction, so it should not be placed directly into a Roughness input without inversion.
Similarly, use the Color / Albedo map intended for the metallic/roughness workflow as your Base Color.
Maps such as Specular, Glossiness, SSS, Sheen or other advanced channels may be included with some Reawote assets, but they are not required for a standard D5 material.
Start with what the material actually needs.
Create the material in D5 Render
The easiest way to build the material is directly on the surface where you want to use it.
Why this matters: D5 exposes different controls depending on the selected material template. Choosing the right template first prevents you from looking for settings that simply are not available in the current material type.
- Open your D5 project and make sure the object receiving the material is in the scene.
- Activate Material Picker from the toolbar or press I.
- Click the surface you want to edit.
- Open the material parameters in the right-hand Material Inspector.
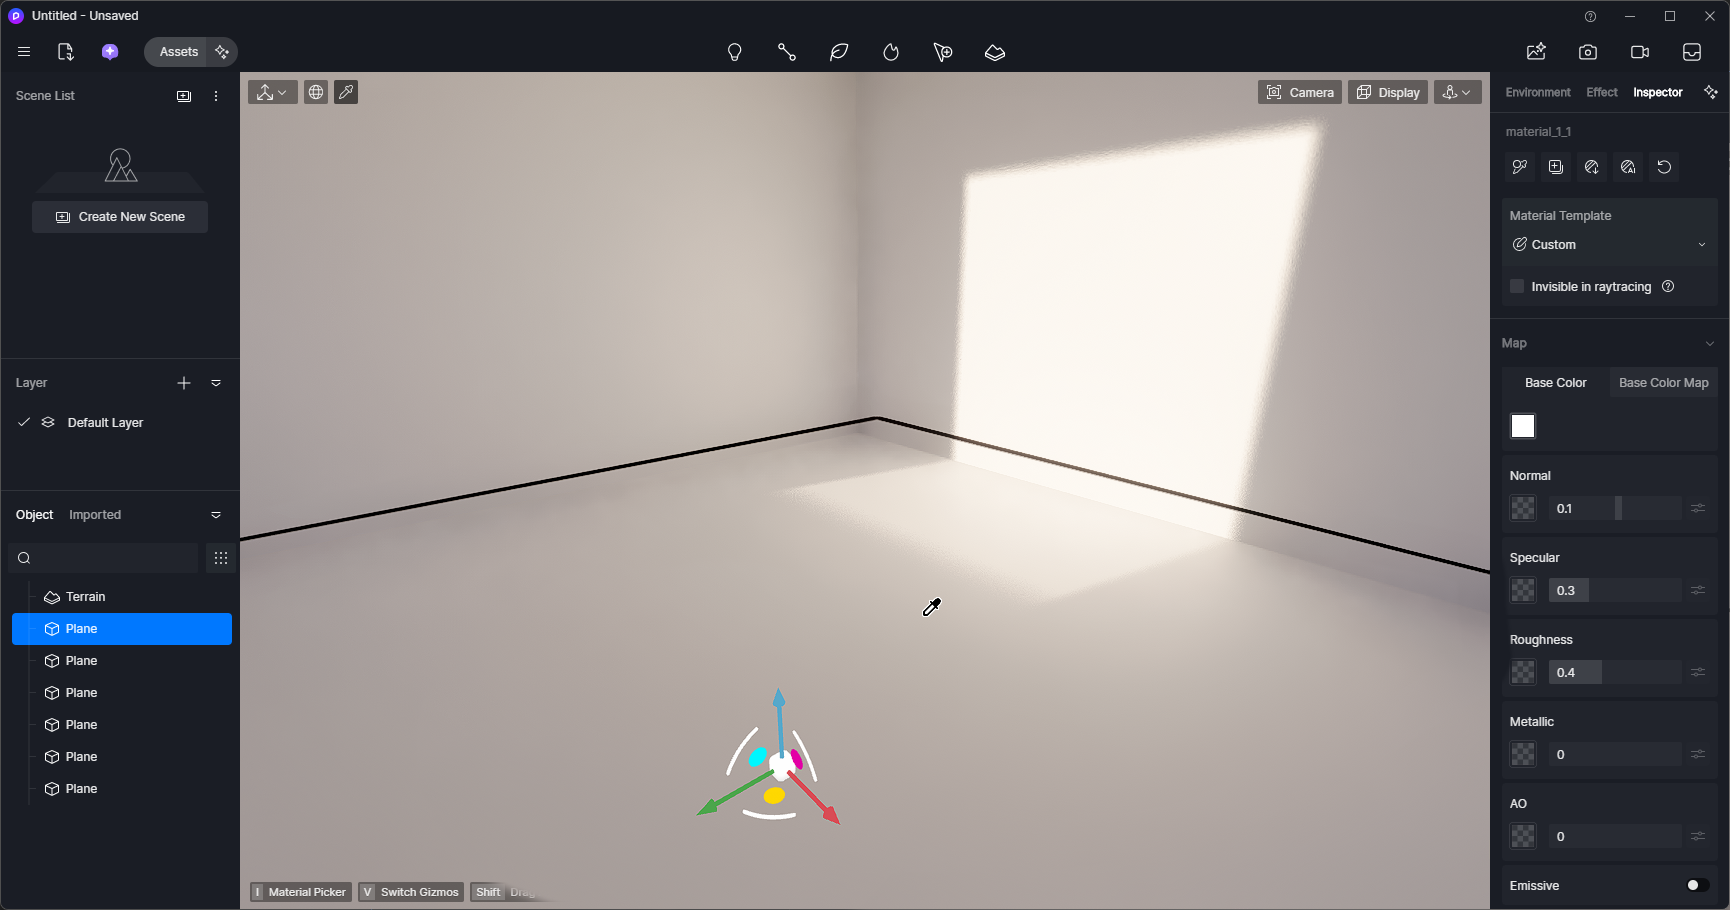
- Open the Material Template dropdown.
- Choose Custom for a standard PBR material that does not require a Height map.
- If you want to use the Reawote Height / Displacement map, choose Displacement instead.
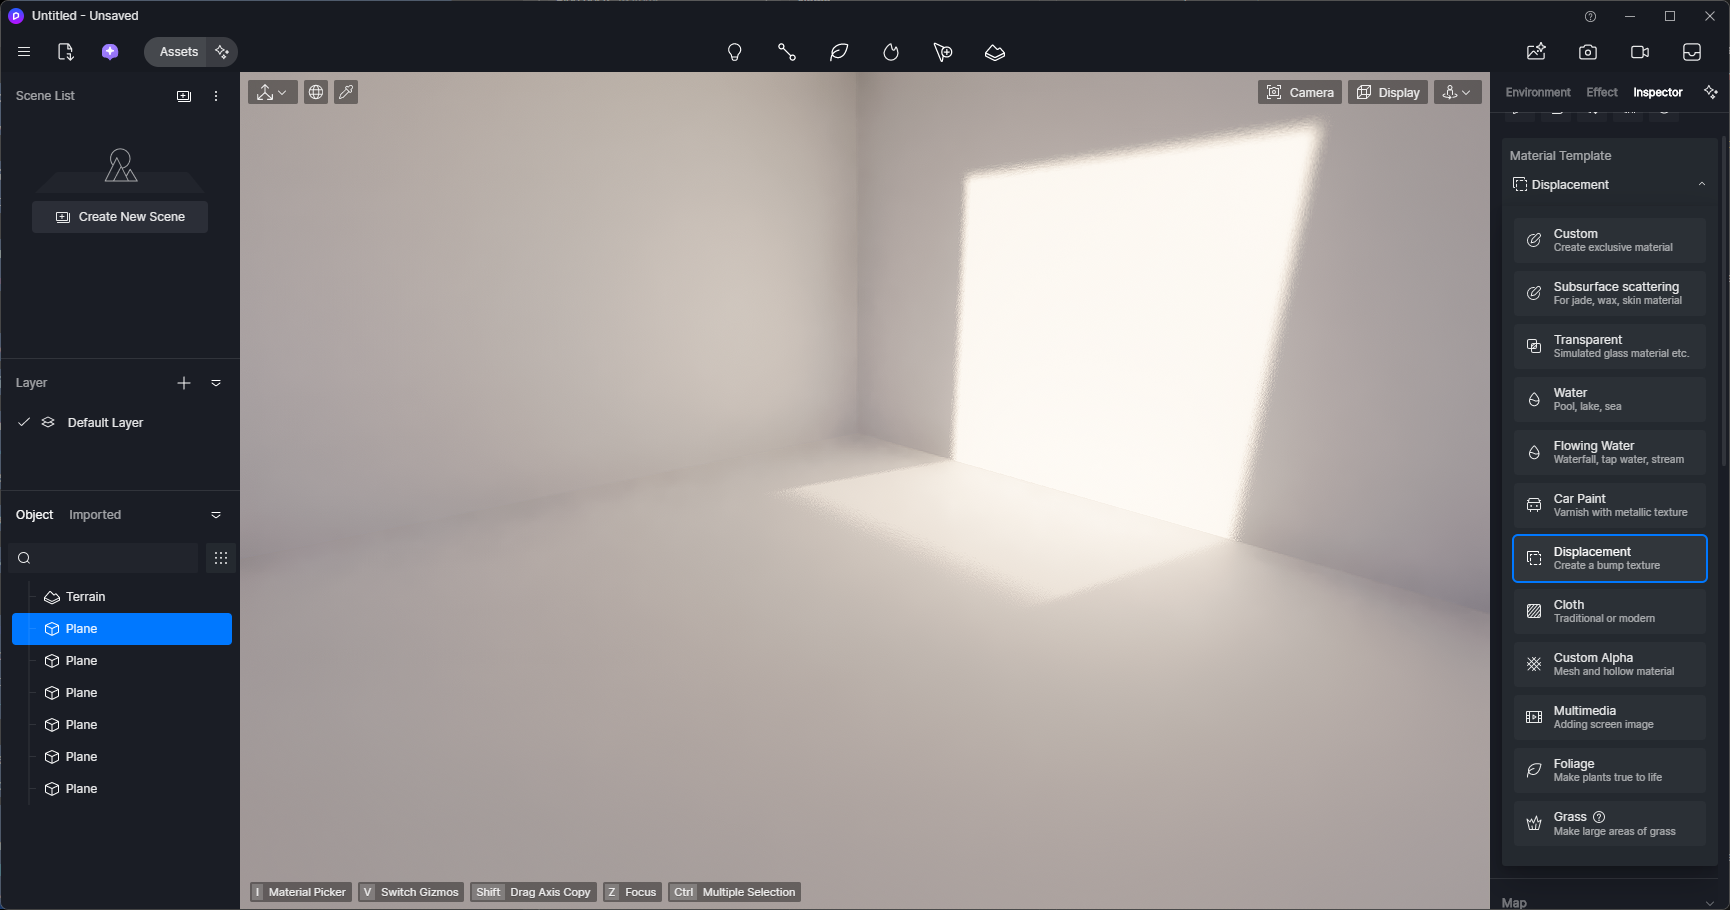
A basic material can work perfectly with Color, Roughness and Normal alone.
A deeply structured brick, stone, tile or plaster may benefit from displacement as well.
The material should follow the surface. Not the other way around.
Connect the PBR maps
You can load each map manually, but D5 also includes Batch Import PBR Textures, which can make the first setup faster.
- In the Material Inspector, choose Batch Import PBR Textures.
- Select the relevant maps from the downloaded Reawote material folder.
- Let D5 assign the recognized textures automatically.
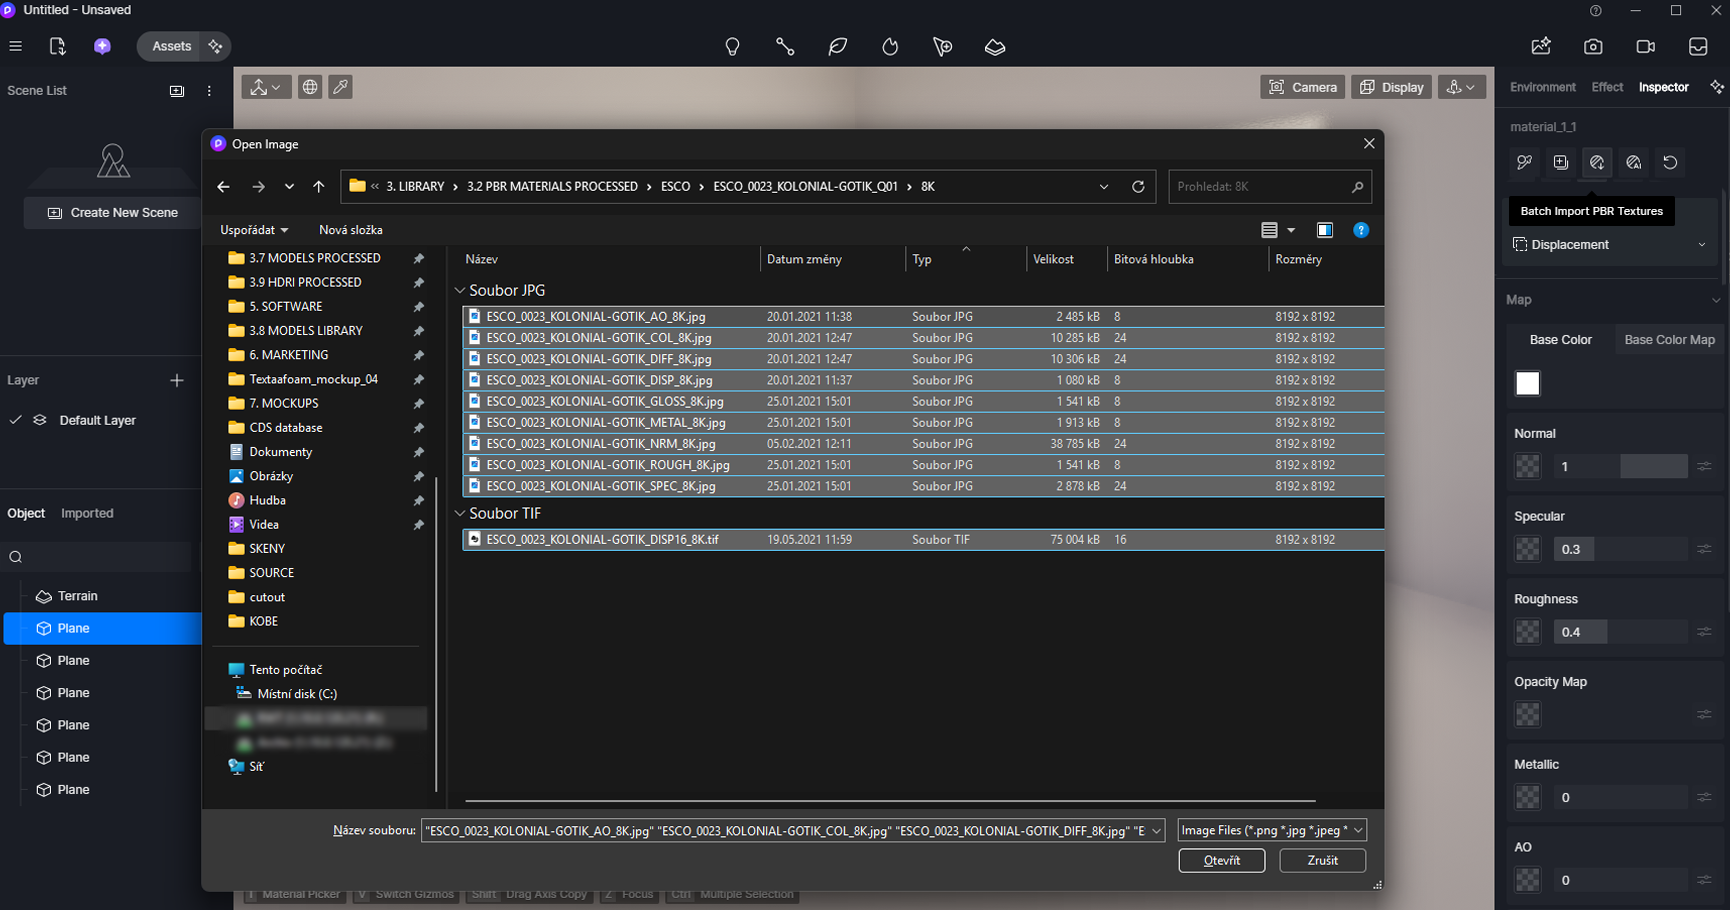
- Check the result before continuing.
- If a map was not recognized or was placed incorrectly, assign it manually to the correct slot.
Batch import saves time. It does not replace checking the material.
Base Color
The Base Color map defines the visible color and pattern of the material.
- Load the Reawote Color / Albedo texture into Base Color Map.
- Keep the Base Color color value neutral white if you want to preserve the original scanned color.
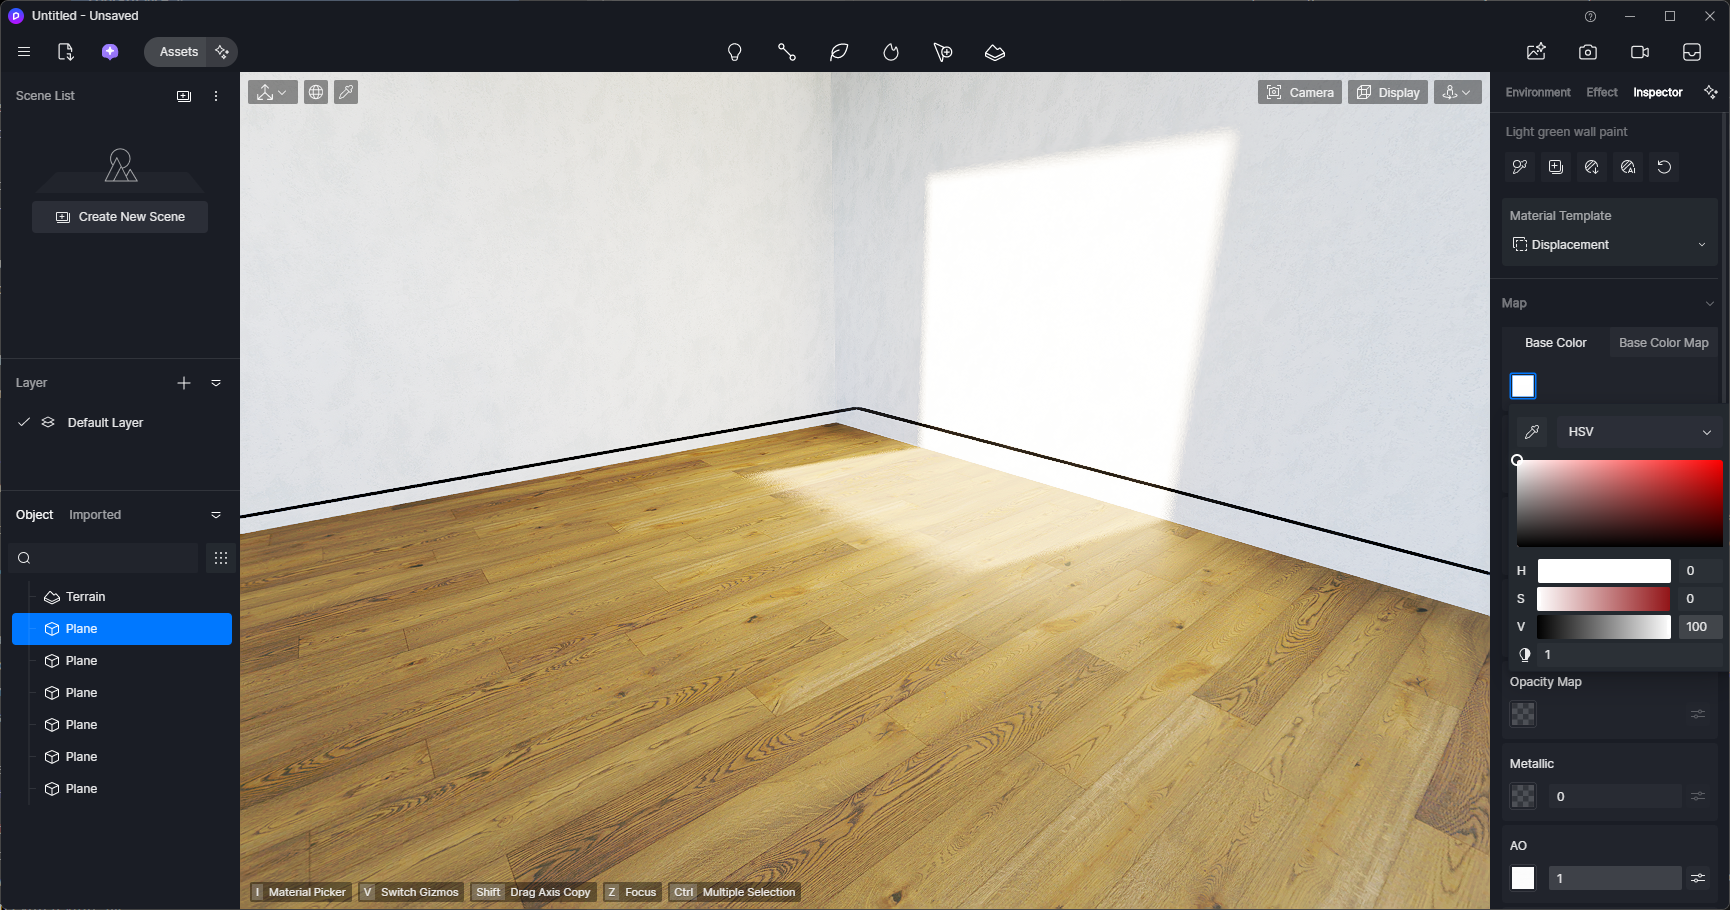
D5 multiplies the color value with the texture map. Tinting the Base Color swatch therefore changes the appearance of the original asset.
That can be useful creatively, but if you want the real product color, start from white.
Roughness
Roughness determines how sharp or soft the reflections appear across the surface.
It is often the difference between polished stone and chalky stone, or between a lacquered finish and raw wood.
- Load the Reawote Roughness map into Roughness.
- Inspect the surface under visible reflections.
- Adjust the overall roughness influence only if the scene requires a small correction.
Do not place a Glossiness map directly into the Roughness slot.
High Glossiness means a smooth, reflective surface. High Roughness means the opposite.
Normal
The Normal map adds fine surface structure without physically changing the geometry.
It is ideal for pores, grain, scratches, fabric weave, fine stone structure and other details that need to react to light without increasing the polygon count.
- Load the Reawote Normal map into Normal.
- Adjust Normal Intensity until the microstructure looks believable.
- Check the material under angled light, where the normal detail is easiest to read.
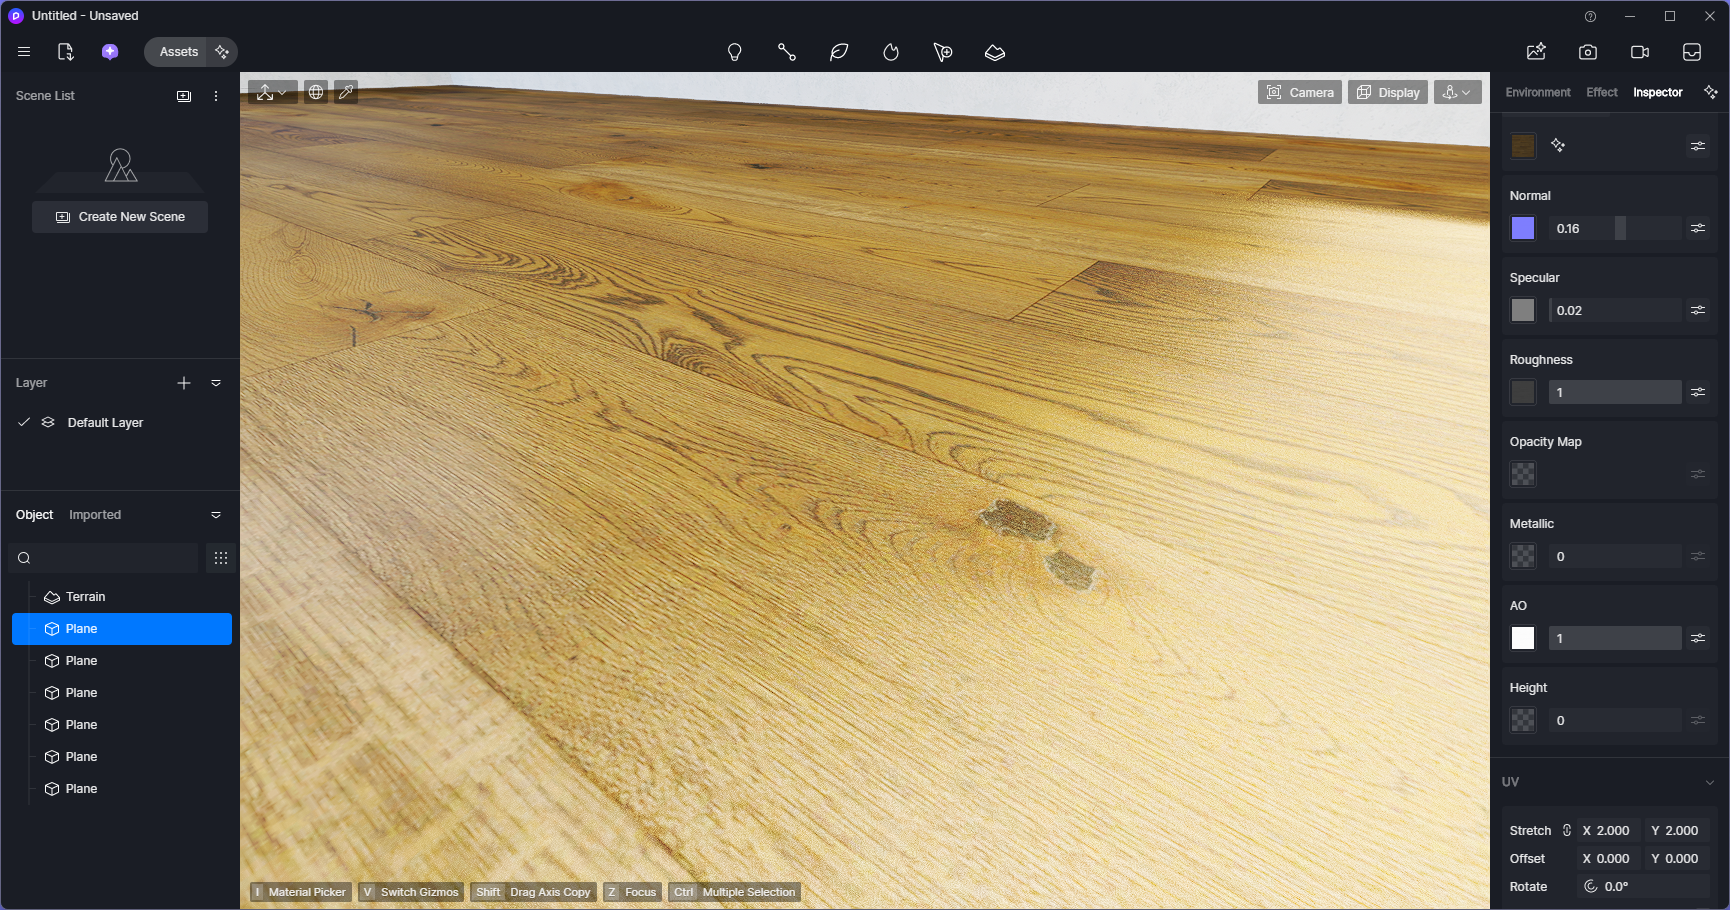
Avoid pushing the effect too far.
Fine grain should affect the light. It should not make the material look inflated.
Get the Normal map direction right
Reawote exports Normal maps in OpenGL, while D5 Render uses DirectX. The two formats differ only in the green channel, so loading a Reawote Normal map directly into D5 reverses the apparent surface direction — grooves can look like ridges and recessed joints can appear raised.
D5 cannot convert this inside the material, so flip the green channel before importing:
- In Photoshop, open the Normal map, go to Channels, select Green, apply Invert, then save the converted version as a new file and keep the original.
- Alternatively, use a free tool such as Materialize or NormalMap-Online with a one-click OpenGL ↔ DirectX conversion option.
- Load the converted map into the D5 Normal slot and set its Color Space Transfer Function to Linear.
Check the result on a groove or mortar joint viewed at an angle: recessed areas should read as recessed. If they look raised, the Normal map still needs converting.
Metallic
The Metallic map tells D5 which areas behave like actual metal.
- Load the Reawote Metallic map into Metallic when one is provided.
- Keep non-metallic materials such as wood, stone, plaster, ceramic, most fabrics and plastics non-metallic.
- Use metallic values only where the real surface is actually conductive metal.
A common mistake is increasing Metallic because a surface needs stronger reflections.
Do not do this.
If stone or wood needs a different reflection response, work with Roughness and the appropriate material parameters instead. Making the surface metallic may increase reflection, but it also changes the physical behavior of the material.
Ambient Occlusion
AO reinforces small cavities, joints and recessed detail.
- Load the Reawote Ambient Occlusion map into AO.
- Keep the effect controlled.
- Check that crevices gain subtle definition without becoming unnaturally dark.
AO should support the material.
It should not look like painted-in shadow.
Opacity
Opacity needs a slightly different setup because a cutout material and a genuinely transparent material are not the same thing.
For a hard cutout such as a perforated panel, mesh, grille or lace:
- Change the Material Template to Custom Alpha.
- Load the Reawote Opacity map into Opacity Map.
- Check that the visible and cutout areas are oriented correctly.
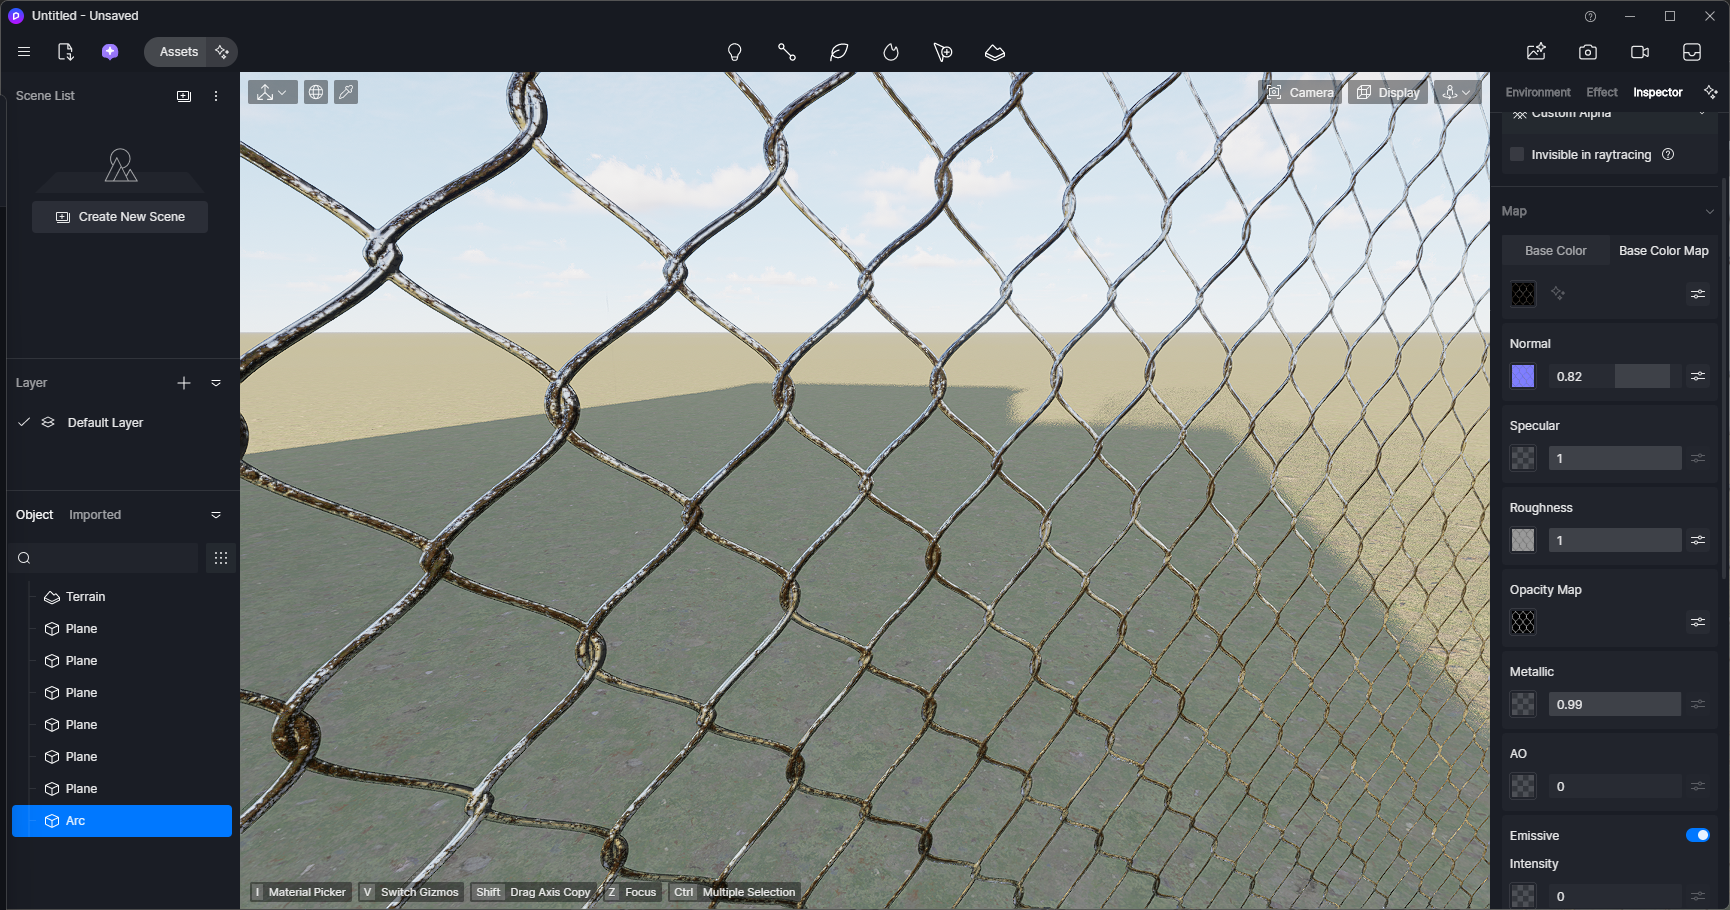
For genuinely transparent materials such as glass, use the Transparent material template instead and work with its transparency controls.
If a material requires both displacement and a cutout mask, the Displacement template can also provide an Opacity Map.
Use the shader that matches the physical behavior of the real surface.
Add real surface depth with displacement
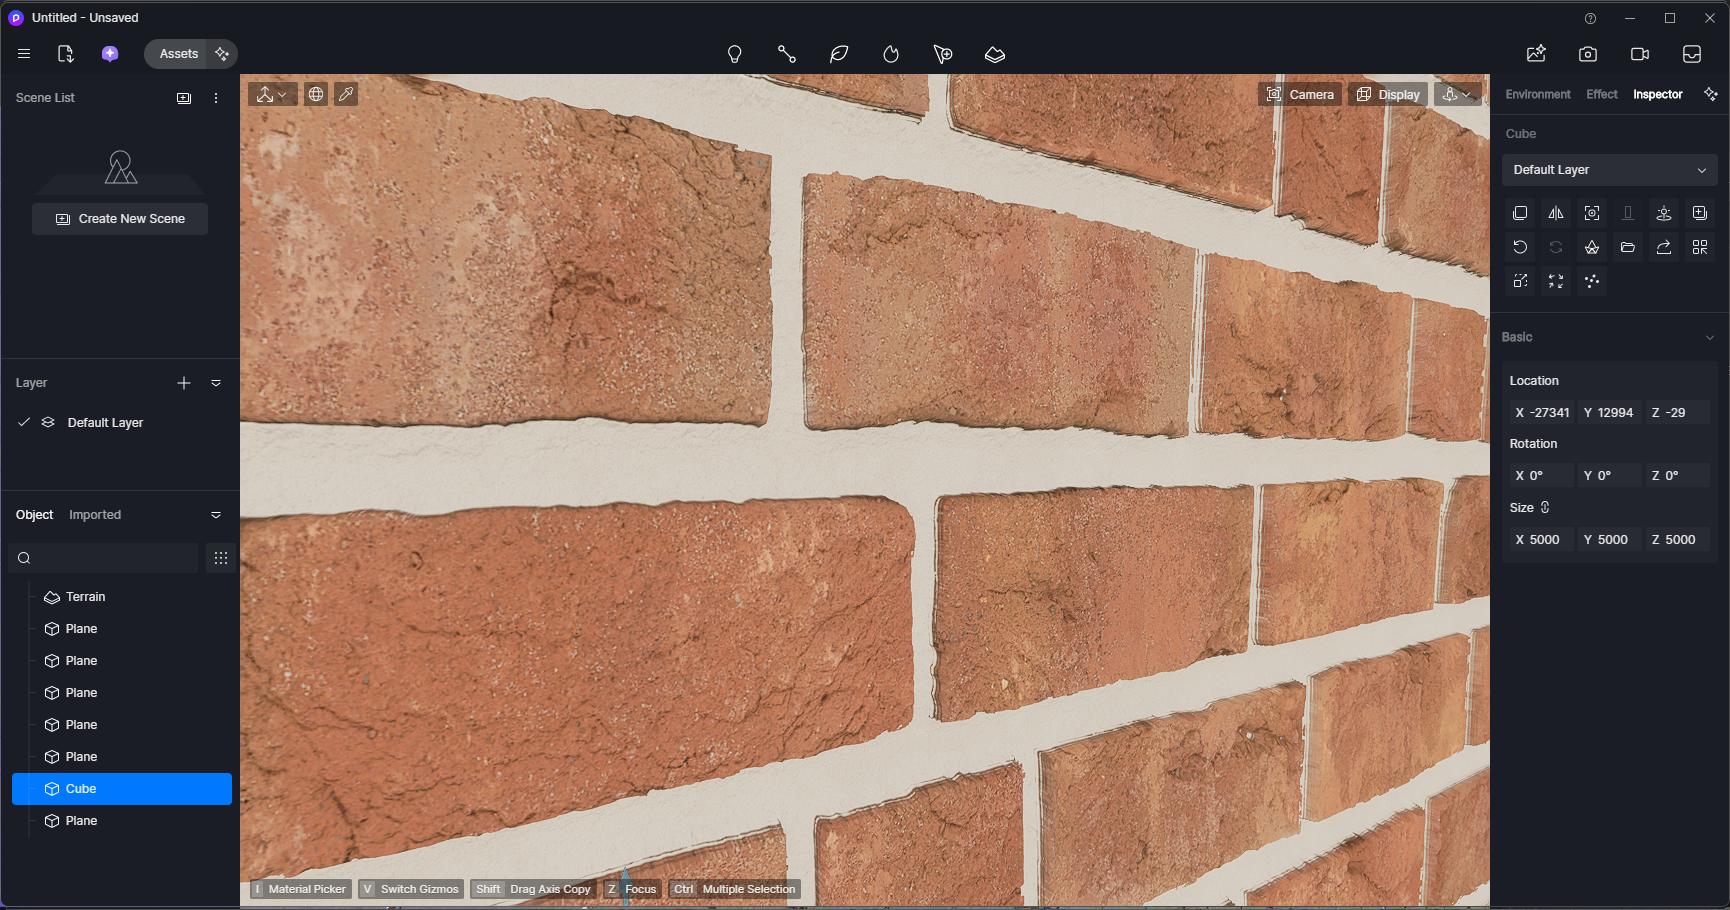
Normal maps add fine surface detail, but they do not change the actual silhouette. For stronger relief — such as brick, rough stone, structured plaster or deep tiles — use the Reawote Height / Displacement map.
- Select the material.
- Set Material Template to Displacement.
- Load the Reawote Displacement / Height map into Height.
- If the relief looks too strong, lower the Height value until it matches the real surface.
In a Height map, brighter areas are raised and darker areas are recessed. Keep the effect realistic.
Match the material to its real-world scale
Reawote lists the real Texture dimensions for each material, so you can scale it to match the actual product instead of guessing.
- Check the Texture dimensions on the Reawote asset page.
- Apply the material to geometry whose real size you know.
- Adjust Stretch in the D5 UV settings until one repeat matches those dimensions.
Keep the same UV setup across all maps so they stay aligned
Fix the most common material problems
Most issues come down to a few simple checks:
- Surface detail looks inverted — the Normal map is still OpenGL; convert it to DirectX by flipping the green channel before importing.
- Material looks too glossy — you loaded a Glossiness map into Roughness; use the Roughness map instead, or invert Glossiness if that is all you have.
- Wood, stone or plaster looks metallic — Metallic is too high; keep non-metals non-metallic and adjust Roughness for reflections instead.
- Pattern looks too large or too small — the scale is off; match the D5 UV Stretch to the Texture dimensions shown in Reawote.
- A map didn't import — D5 auto-detects maps by filename; if one is not recognized, assign it manually.
Save the finished material for the next project
Once the material is mapped, scaled and adjusted correctly, there is no reason to build it again from scratch.
- Select the finished material.
- Click Add to local in the Material Inspector.
- Find the material later in your local D5 material library and reuse it in another project.
The first material takes a little longer because you are learning where everything belongs.
After that, the process becomes simple: choose the Reawote asset, connect the right maps, match the physical scale and keep designing.
Less rebuilding. Less guessing. More time working on the image.
Explore PBR materials in the Reawote library →
Related posts

Join our community and stay updated on all things 3D
Sign up to our newsletter.


Build a better world with real-world 3D detail
Step into the digital world and explore new ways to create, present, and distribute products — without limits or physical constraints.